
Nobody wants to step into a puddle of water in their kitchen, especially when it’s coming from an appliance that’s supposed to keep your food safe. This guide walks you through the most common reasons a refrigerator leaks water and what you can actually do about it.
A leaking fridge is one of those problems that starts small and gets worse fast. Left alone for even a few days, water can work its way under flooring, into cabinet bases, and start growing mold in places you can’t see. In Mission, where we get our fair share of humidity swings through the year, moisture problems inside appliances tend to show up more quickly than homeowners expect.
At Dewdney Appliance Repair, we get calls about refrigerator leaking water pretty regularly. Most of the time, the fix is straightforward once you know where to look. Sometimes it’s a ten-minute job. Other times, it points to something that needs a professional. Either way, understanding what’s happening is half the battle.
Key takeaways
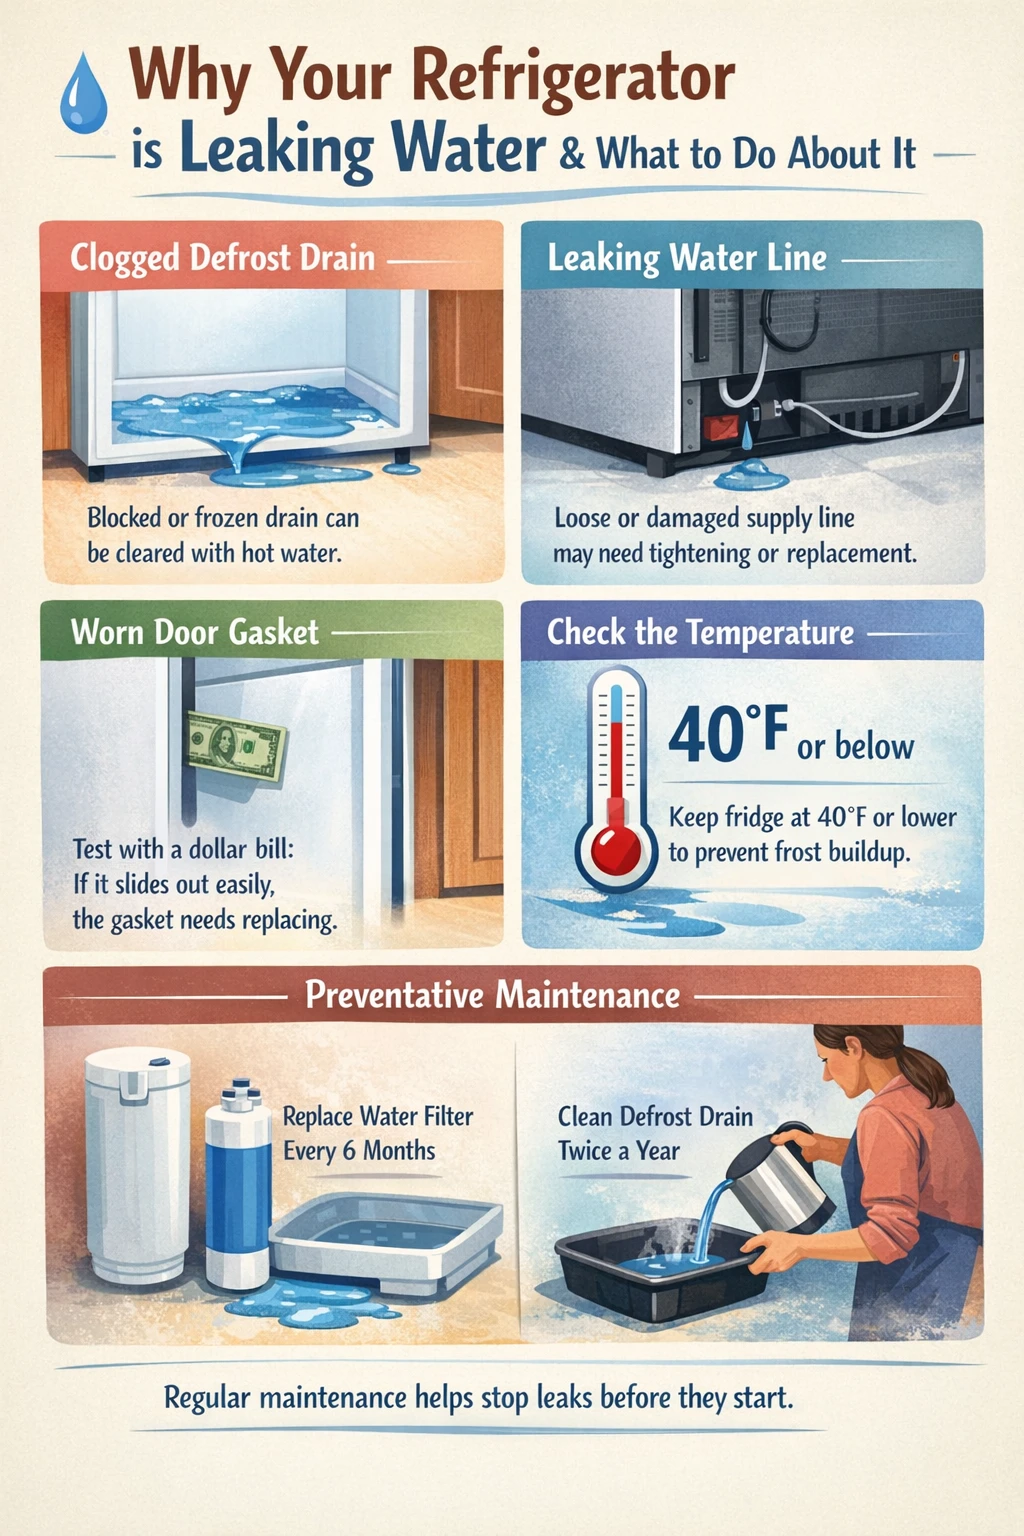
- A clogged or frozen defrost drain is the most common cause of water pooling inside a refrigerator, and it can often be cleared at home with hot water and a little patience.
- Water leaking from the back of the fridge usually points to a damaged or loose water supply line, which may only need tightening or a simple section replacement.
- A worn door gasket lets warm air in, which creates excess condensation you can test yours by closing the door on a dollar bill and seeing if it slides out easily.
- The FDA recommends keeping your refrigerator at 40 degrees Fahrenheit or lower; incorrect temperature settings can cause frost buildup that leads to leaks.
- Replacing your water filter every six months and cleaning the defrost drain twice a year are the two maintenance steps most likely to prevent future leaks.
- If the leak is near electrical components, near the compressor, or involves refrigerant, stop troubleshooting and call a professional.
Why your refrigerator is leaking water
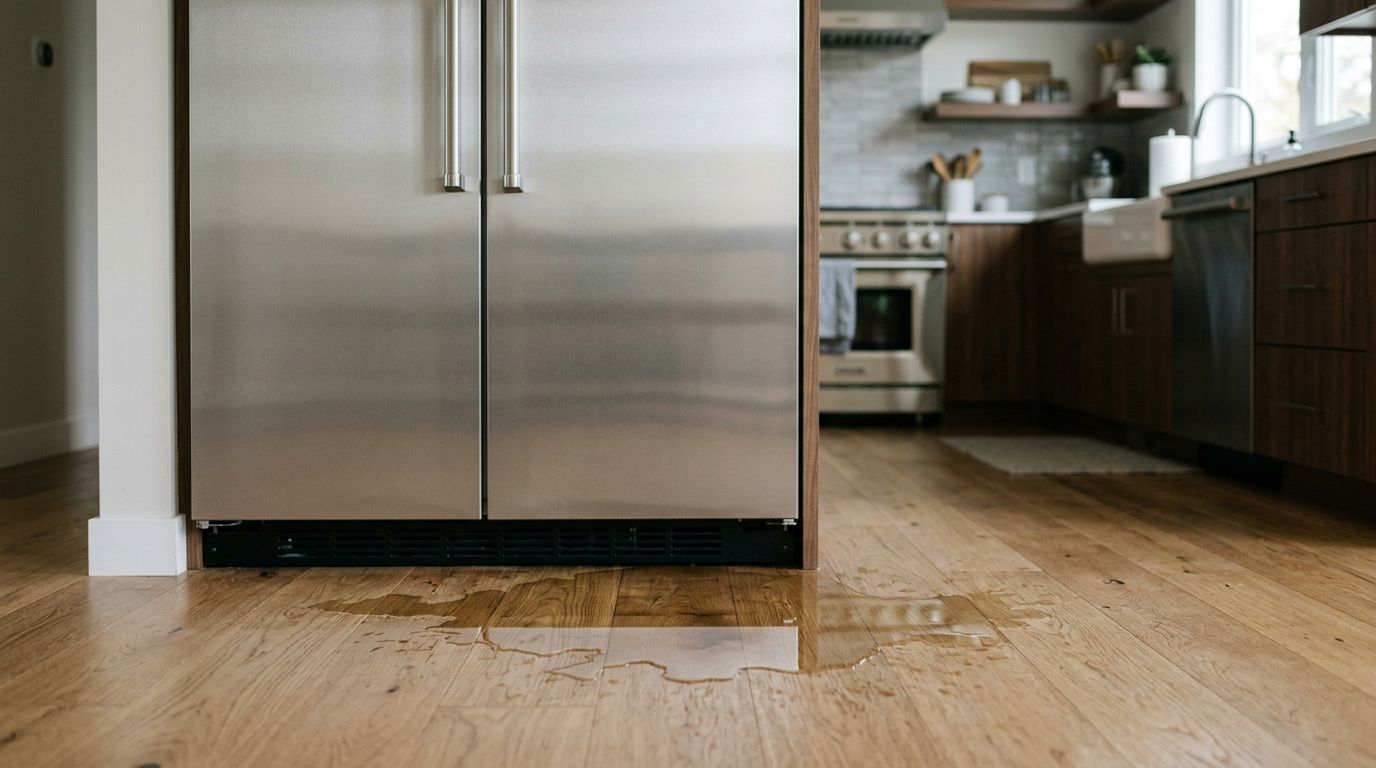
The short answer: water is getting somewhere it shouldn’t be, usually because a drain is blocked, a seal has failed, or a line has been damaged. The location of the leak is your best clue. Water inside the fridge compartment almost always means a drain issue. Water under the fridge from the back points to the supply line. Water pooling at the front center often traces back to the drain pan or door seal.
Modern refrigerators run a defrost cycle automatically, melting any frost that builds up on the evaporator coils. That meltwater is supposed to flow down through a drain hole, travel through a drain line, and land in a pan near the bottom of the fridge where it evaporates. When any part of that path gets blocked by a chunk of ice, a piece of food debris, or even a stray frozen pea as one repair forum commenter memorably discovered water backs up and has nowhere to go but down into your fridge compartment or onto your floor.
In our experience, about half the leaking fridge calls we get come down to that defrost drain. The other half split between supply line issues, failed door gaskets, and drain pan problems. Knowing which category your leak falls into before you start poking around saves a lot of time.
The defrost drain: the usual suspect
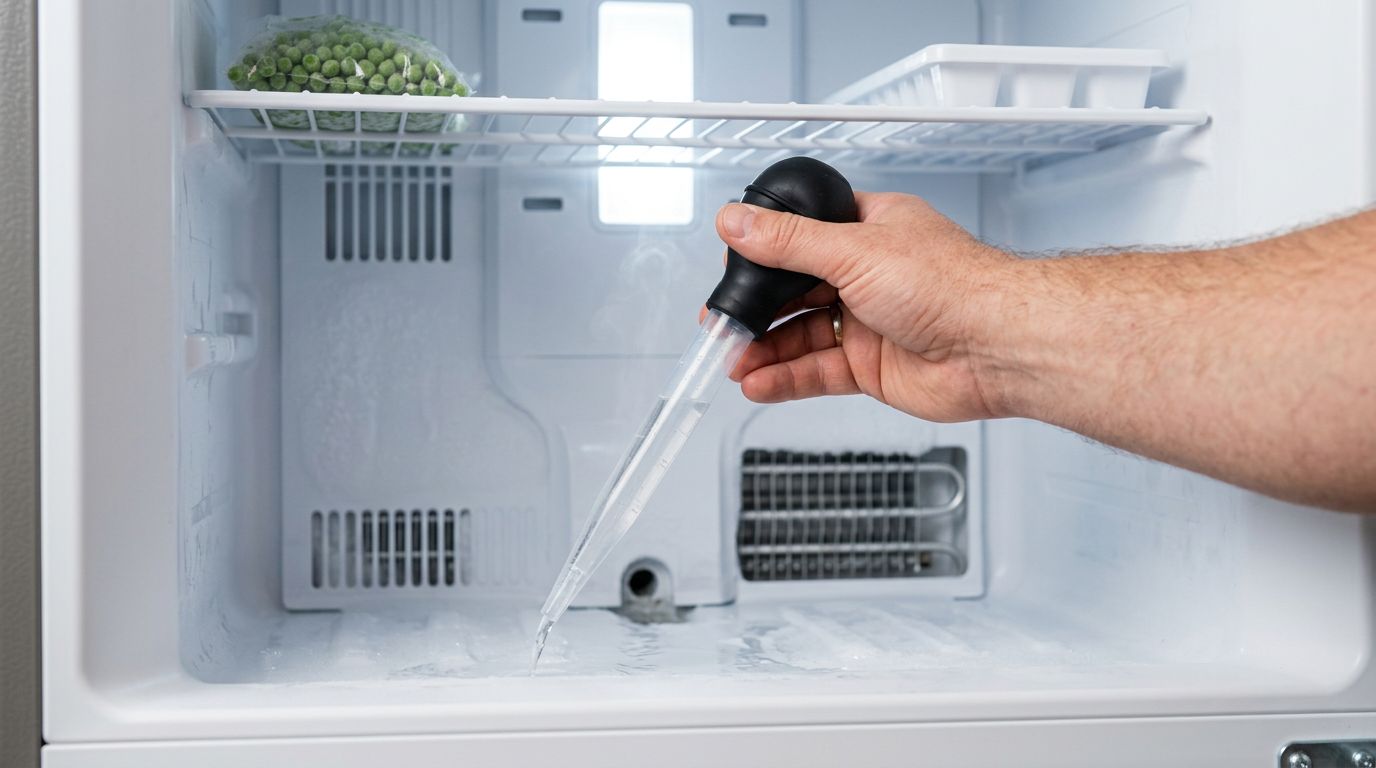
Let’s spend some time here because this is where most leaks start. The defrost drain sits at the bottom of the freezer or refrigerator compartment, usually behind a back panel. During each defrost cycle, meltwater flows through this drain and down to the evaporation pan. When it gets clogged, that water has nowhere to go.
Signs of a clogged defrost drain are pretty recognizable. You’ll notice water pooling under the crisper drawers, or ice forming in the bottom of the freezer compartment. If it’s been going on a while, you might find a solid sheet of ice covering the freezer floor which then melts partially and leaks out. Some people lay down paper towels and find them soaked each morning, which is exactly what this problem looks like.
Clearing the drain yourself is doable if you’re comfortable with basic appliance work. Unplug the fridge first always. Pull out the crisper drawers and remove the back panel inside the fridge to expose the drain hole. Pour a small amount of hot water down the drain using a turkey baster to melt any ice blocking it. You can also use a piece of flexible wire, weed trimmer line, or even a coaxial cable (yes, really people get creative) to gently clear debris. You want to hear the water gurgle through to the pan below. That gurgle tells you the line is clear.
If the drain refreezes within a few weeks, there’s usually an underlying reason a failed defrost heater, a faulty defrost timer, or a temperature sensor that’s not working correctly. That’s the point where a professional diagnosis makes more sense than repeated DIY fixes.
What about a frozen drain line?
Sometimes the clog isn’t debris it’s solid ice all the way down the drain line. This usually happens when the fridge door has been left open for an extended period, letting humid room air into the system. That moisture condenses on the evaporator coils and eventually freezes the drain line solid.
The fix is a full defrost. Unplug the fridge, remove the food, and let it thaw for 8 to 12 hours with the doors open. If you want to speed things up, aim a hair dryer at the freezer’s back wall on a low setting keep it moving and don’t hold it in one spot. Some people use boiling water in a turkey baster and then suction it back out with a shop vac, which works well if you’re patient. Once thawed, check that the drain flows freely before plugging the fridge back in and restocking it.
Water supply line and dispenser leaks
If your fridge has a water dispenser or ice maker, there’s a water supply line running from the wall to the back of the appliance. This line is usually plastic or braided stainless, and it’s a fairly common source of leaks especially in older homes around the Hatzic area where fridges may not have been moved or inspected in years.
Pull the fridge away from the wall and look at where the supply line connects. A loose fitting is the best-case scenario snug it up and see if the leak stops. If the tubing itself has a crack or has become brittle, you’ll need to replace the damaged section. This is a manageable DIY job if you’re comfortable with basic connections: cut out the damaged section, use compression fittings or push-to-connect couplers to bridge the gap, and check for drips before pushing the fridge back into place.
A leaking water dispenser can also be caused by trapped air in the supply line, especially after a filter replacement or if the fridge was recently moved. Let the fridge run for a full day, dispense a couple of quarts of water to purge the air, and see if the dripping stops. If it doesn’t, check that the water filter is seated correctly a filter that’s cross-threaded or only partially installed can leak steadily. According to most manufacturer guidelines, water filters should be replaced roughly every six months, and a new filter that’s the wrong model for your fridge or incorrectly installed can cause exactly this kind of drip.
For context, you can find general guidance on water line safety and shut-off valves through resources like the U.S. Department of Energy’s home water guidance pages, which are useful if you’re not sure what type of supply line your home has.
Door gasket and condensation problems
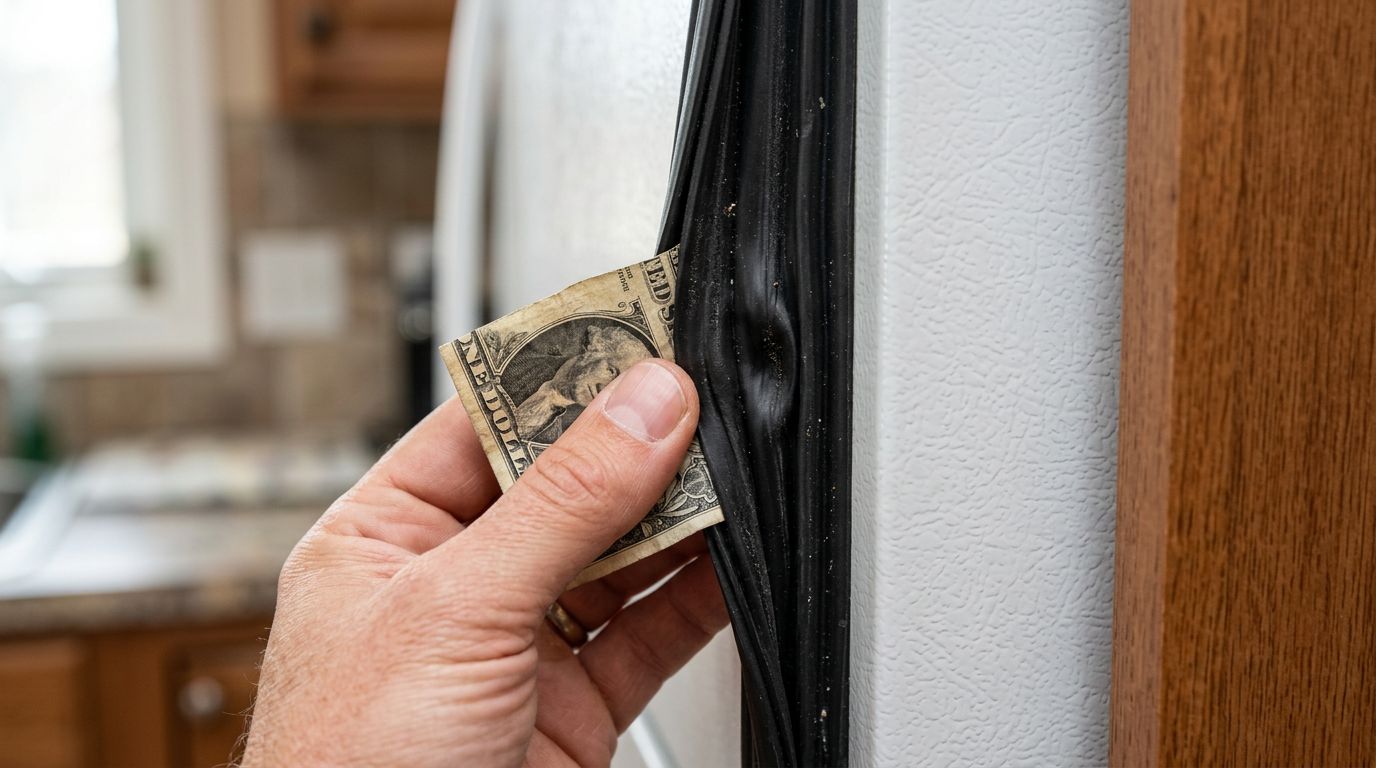
Here’s one people overlook. The rubber gasket that runs around the perimeter of your fridge door does one job: it creates an airtight seal when the door is closed. When that seal fails through cracking, warping, or simply losing its flexibility over time warm air sneaks in every time the door is shut. That warm air hits the cold interior, moisture condenses, and you end up with water droplets forming on the walls or pooling at the bottom of the compartment.
The dollar bill test is the quickest way to check yours. Close the fridge door on a piece of paper or a dollar bill so it’s half in and half out. If you can slide it out with little resistance, the gasket isn’t sealing properly in that spot. Run the same test around the whole door perimeter.
A dirty gasket will sometimes perform like a damaged one. Give it a thorough cleaning with warm, soapy water and a soft cloth, paying attention to the folds where gunk builds up. A clean gasket often restores a surprisingly solid seal. If cleaning doesn’t help, replacement gaskets are available for most fridge models check your owner’s manual or search the manufacturer’s website using your model number. The Consumer Reports refrigerator repair section has useful guidance on whether a gasket replacement is worth doing yourself or worth hiring out based on fridge age.
High humidity in your home can compound a borderline gasket problem. If Mission’s summer humidity is running high and you’re seeing condensation on the outside of the fridge as well as inside, a small dehumidifier in the kitchen area can make a real difference. We see this occasionally in older homes in Silverdale and the surrounding areas, where kitchens tend to have less ventilation than newer builds.
The drain pan and what it actually does
The drain pan sometimes called the drip tray sits underneath the fridge near the compressor. All that meltwater from the defrost cycle ends up here, and under normal conditions it evaporates before it has a chance to overflow. The heat from the compressor helps speed up that evaporation. It’s a simple, mostly passive system that most people never think about.
Problems show up in two ways. First, the pan can crack. A cracked pan won’t hold any water it just lets it drip straight onto your floor. Pull the pan out (you’ll usually need to remove a lower front or rear access panel with a screwdriver), inspect it for visible damage, and replace it if needed. Second, the pan can overflow. This usually happens when there’s more water coming in than the compressor heat can evaporate which can mean high ambient humidity, a door seal issue, or simply more defrost water than usual. Samsung’s support documentation specifically notes that auto evaporation can be affected when room temperature drops below about 25 degrees Celsius or humidity exceeds 75%.
The fix for an overflowing pan is to empty and clean it, address the root cause of excess water, and make sure there’s enough airflow around the base of the fridge for normal evaporation to happen. A fridge pushed too tight against a wall or cabinet can restrict airflow to the pan and make this problem worse.
When the problem is the ice maker
Ice makers have their own set of failure points. A fill valve that sticks open, a cracked ice tray, a water line that’s disconnected inside the freezer compartment any of these can produce a surprising amount of water in a short time. If you notice ice forming in unusual places inside the freezer, or water showing up only after the ice maker runs a fill cycle, that’s a strong clue.
Some of these fixes are accessible to a handy homeowner. A replacement ice maker assembly for many common fridge brands runs $30-$50 at hardware stores and installs with basic tools. But if the leak involves the water valve itself or internal plumbing behind sealed panels, that’s a job for a technician. The same goes for any situation where you suspect refrigerant is involved refrigerant leaks produce a different set of symptoms (ice not forming, fridge not cooling properly) and require certified handling.
The general repair guidance available through appliance resource sites can help you identify whether your ice maker issue is a DIY-friendly fix or something that needs professional attention before you start pulling things apart.
Frequently asked questions
After walking through the main causes, a few questions come up again and again. Here are honest answers to the ones we hear most often including a couple where the right answer is “it depends.”
Why is my fridge leaking water only at night?
This is almost always a defrost drain issue. Most refrigerators run their automatic defrost cycle during low-use periods often overnight or in the early morning hours. When the defrost cycle runs, the evaporator coils warm up, frost melts, and that meltwater flows toward the drain. If the drain is blocked or frozen, the water backs up and pools. By morning, you find it. The overnight timing is the giveaway that the defrost cycle is involved.
Is water pooling under the crisper drawers serious?
It’s definitely worth fixing promptly, but it’s rarely a crisis. Water collecting under the crisper drawers is a classic sign of a clogged defrost drain the water has nowhere to drain, so it sits at the bottom of the compartment. Left alone, it can eventually spill out onto your floor, damage your flooring, or freeze into a solid sheet that makes the problem worse. Clear the drain as described earlier and keep an eye on it over the following week to make sure it doesn’t come back.
Can I damage my fridge by trying to fix the leak myself?
For the fixes described here clearing the drain, checking the gasket, inspecting the drain pan, tightening supply line fittings the risk is low if you unplug the fridge first and work carefully. Where people get into trouble is using sharp tools near the drain lines (easy to puncture), applying a heat gun too close to plastic components, or tackling electrical or refrigerant work without training. When in doubt, a quick call to a repair service before you start can save you from turning a $50 fix into a much larger problem.
How often should I maintain my fridge to prevent leaks?
A realistic maintenance schedule looks like this: clean the defrost drain every six months (or every time you notice slow drainage), replace the water filter every six months if your fridge has a dispenser or ice maker, wipe down the door gasket monthly as part of your regular fridge cleaning, and pull the fridge out once a year to check the supply line and clean the condenser coils at the back. None of this takes more than 30-45 minutes per year in total. The payoff is avoiding the kind of leak that goes unnoticed for two weeks and quietly damages your flooring.
When should I stop troubleshooting and call a professional?
Call a professional if the leak is coming from near the compressor or electrical components, if you suspect a refrigerant issue, if internal components like valves or pumps appear to be involved, or if you’ve addressed all the obvious causes and water is still showing up. Also call if the ice maker system seems to be the problem and the leak is inside the walls of the appliance rather than accessible from the compartment interior. A technician can diagnose these situations quickly and give you an honest assessment of whether repair or replacement makes more sense for your fridge’s age and condition.
Wrapping up
A refrigerator leaking water is usually a solvable problem. Start by locating where the water is coming from, work through the most common causes in order defrost drain first, then supply line, then gasket, then drain pan and don’t skip the step of unplugging the fridge before you start poking around inside. Most leaks that show up inside the compartment trace back to a clogged or frozen drain, and most leaks at the back come from the supply line. If you’ve worked through the checklist and can’t find the source, or the problem comes back within a few weeks of your fix, that’s the right time to bring in a professional. At Dewdney Appliance Repair, we handle fridge repair mission-wide and across the surrounding area, including refrigerator repair and appliance leak diagnosis for all the common makes and models. Give us a call and we’ll help you figure out what’s actually going on no guesswork, no unnecessary repairs.
